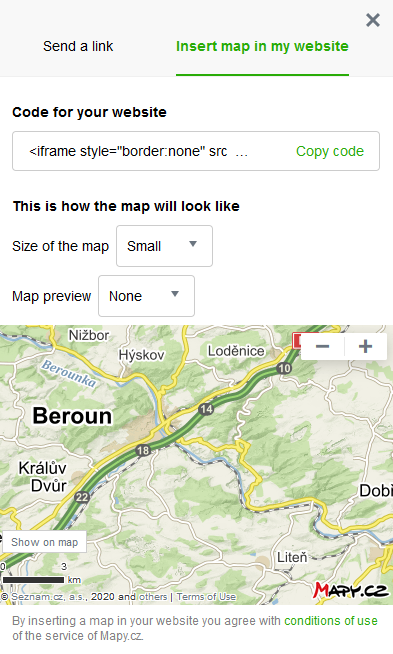
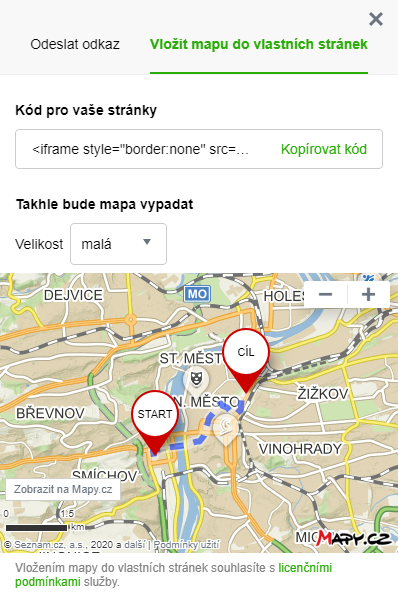
Insert map in my website
If you need to place a map window with map including shared content (personal data shown on the map) on website, it is possible for you to do so by means of the function "Insert map in my website" (button Share -> Tab "Insert map in my website").
What can be shared in the map
By means of the so-called iFrame component, you can show all the content in the map which you may share. For example, it is a matter of:
- POI-group
- content of the selected component in My maps
- planned route
- manual measurement
- proper points
- a photo on Photomap
- view of the service Panorama
- search result
What parameters you can set in the framework of preparation of shared map
- size of the resulting shared map (small, medium, great, proper)
- display of the preview map of CR/world
- display of proper legends with the content that you share
Instruction for adding a map to your websites
If you wish to insert a map into your proper websites, you should proceed as follows:
- Choose preferred map source in the map
- (you may choose any map – e.g. basic, tourist, aerial, winter map, etc., namely including 3D view)
- Select the content which you would like to share on your websites – the content may be either created manually or saved in the folder My maps
- Choose the button „Share“ in the right panel (either on the detail or above the folder) or select the option „Share this map” in the expandable menu Tools
- Select subsequently the bookmark “Insert map in proper websites” in the shown pop-up window and if you share an item/folder saved in My maps, permit its sharing by means of switch.
- Set the size of the resulting window using either one of the pre-defined sizes (small, medium, large, or by inserting proper preferred window size)
- You may also switch on preview map display or proper legends display
- Verify what the map will look like including the content
- And then it is sufficient to copy, by means of the button "Copy code", the generated code and to insert it to the websites
How to switch on preview map display in a shared map
If you wish to help users with orientation, where the place shared by you is situated within the context of the Czech Republic/world as a whole, you may switch on the function of preview map display in the shared map. You may activate the preview map display by the switch “Preview map” in the sharing dialogue with map preview. You may then select either preview map of the Czech Republic or that of the world.
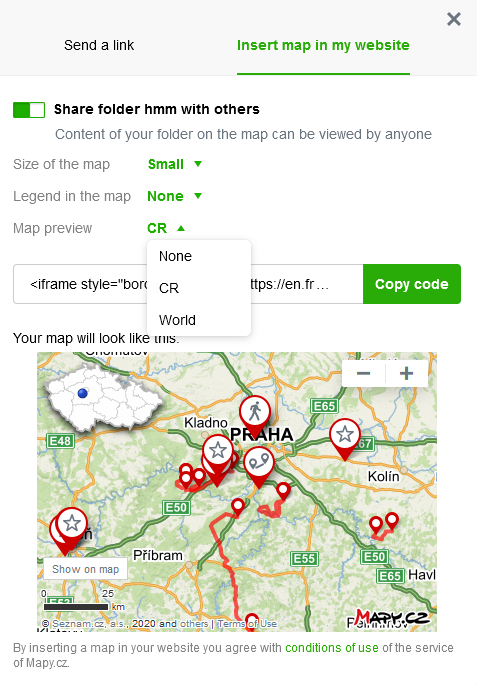
After having selected a type of preview map, map regeneration will take place. The preview map will be automatically displayed in the left upper corner, the blue point automatically shows position of the item shared by you or, as the case may be, it corresponds to position of the centre of the map shared by you.
How to switch on displaying of proper legends in shared map
You may provide the items shared in your map with proper text description.
You may insert proper legend for a proper point or for any item, which you save into My maps and with which you insert your proper legend manually either immediately in the course of saving or with which you additionally modify the initial name to some other, preferred by you. Thus, you may add legends to any saved points of interest, to planned routes, to proper measurements etc.
You may subsequently activate proper legend display in a shared map by means of the switch “Legends in a map” in the sharing dialogue with map preview. You may select the option “None” or “Proper”.
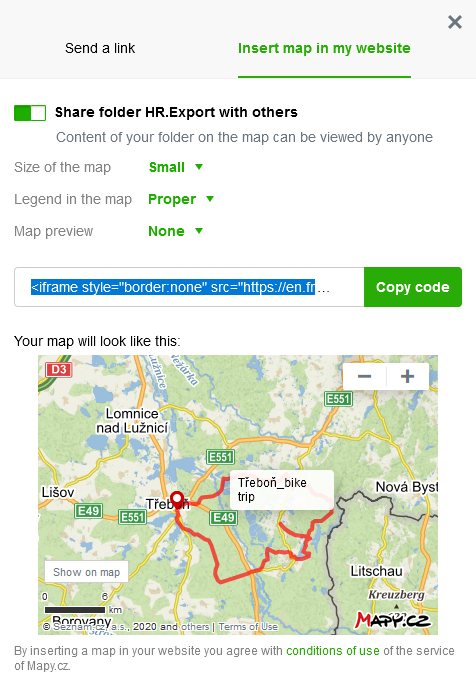
After the option “Proper" has been selected, there will be preview regeneration and the proper legends will be automatically displayed in the map preview with those shared items which you have inserted manually. With other items, the original markers with icons without legends will remain to be displayed.
Click-through of different shared items
The end users, who consume the content of a map shared by you, may display details of the shared items by a click-through upon the web Mapy.cz. Thus, if you share a tip for trip (e.g. visit of an interesting castle), detail of this shared item will be displayed on Mapy.cz after a click-through on it, namely including text description, address, links and other information. In case of a shared route, detail of that planned route with itinerary and route profile will be displayed after click-through. The click-through is functioning automatically with all the shared items, i.e. it is not activated anywhere.
If you wish to share a record made e.g. by an external system in GPX format in a map, it is necessary to proceed as follows:
- Download the file with the route in GPX format
- Import the GPX file to the maps (i.e. Tools -> GPX Import)
- The record will be shown on the map as so-called manual measurement, ATTENTION! imported, i.e. not saved manual measurement, however, has no geometry and thus cannot be shared immediately!
- Save the manual measurement into any folder in My Maps (which requires registration)
- Let show the folder into which you have stored the manual measurement in form of recorded route
- Choose the selected item and let show a detail of the saved route / hand measurement
- Proceed subsequently in a standard manner with the step 3 according to the proceeding stated above (i.e. choose the button "Share")
Examples of using iFrame
We state below possible examples of using iFrame:- e-shops – location of collection points of goods
- amateur competition organizer – route of the competition including location of refreshment stations as well as of first aid centres
- food blogger – location of recommended gastronomic enterprises with French cuisine